How I turned a €5 IKEA speaker into a voice assistant
An ESP32, a microphone, Home Assistant and Claude inside a €5 IKEA KALLSUP cube.
, 23 min. read
Intro: why I bought it
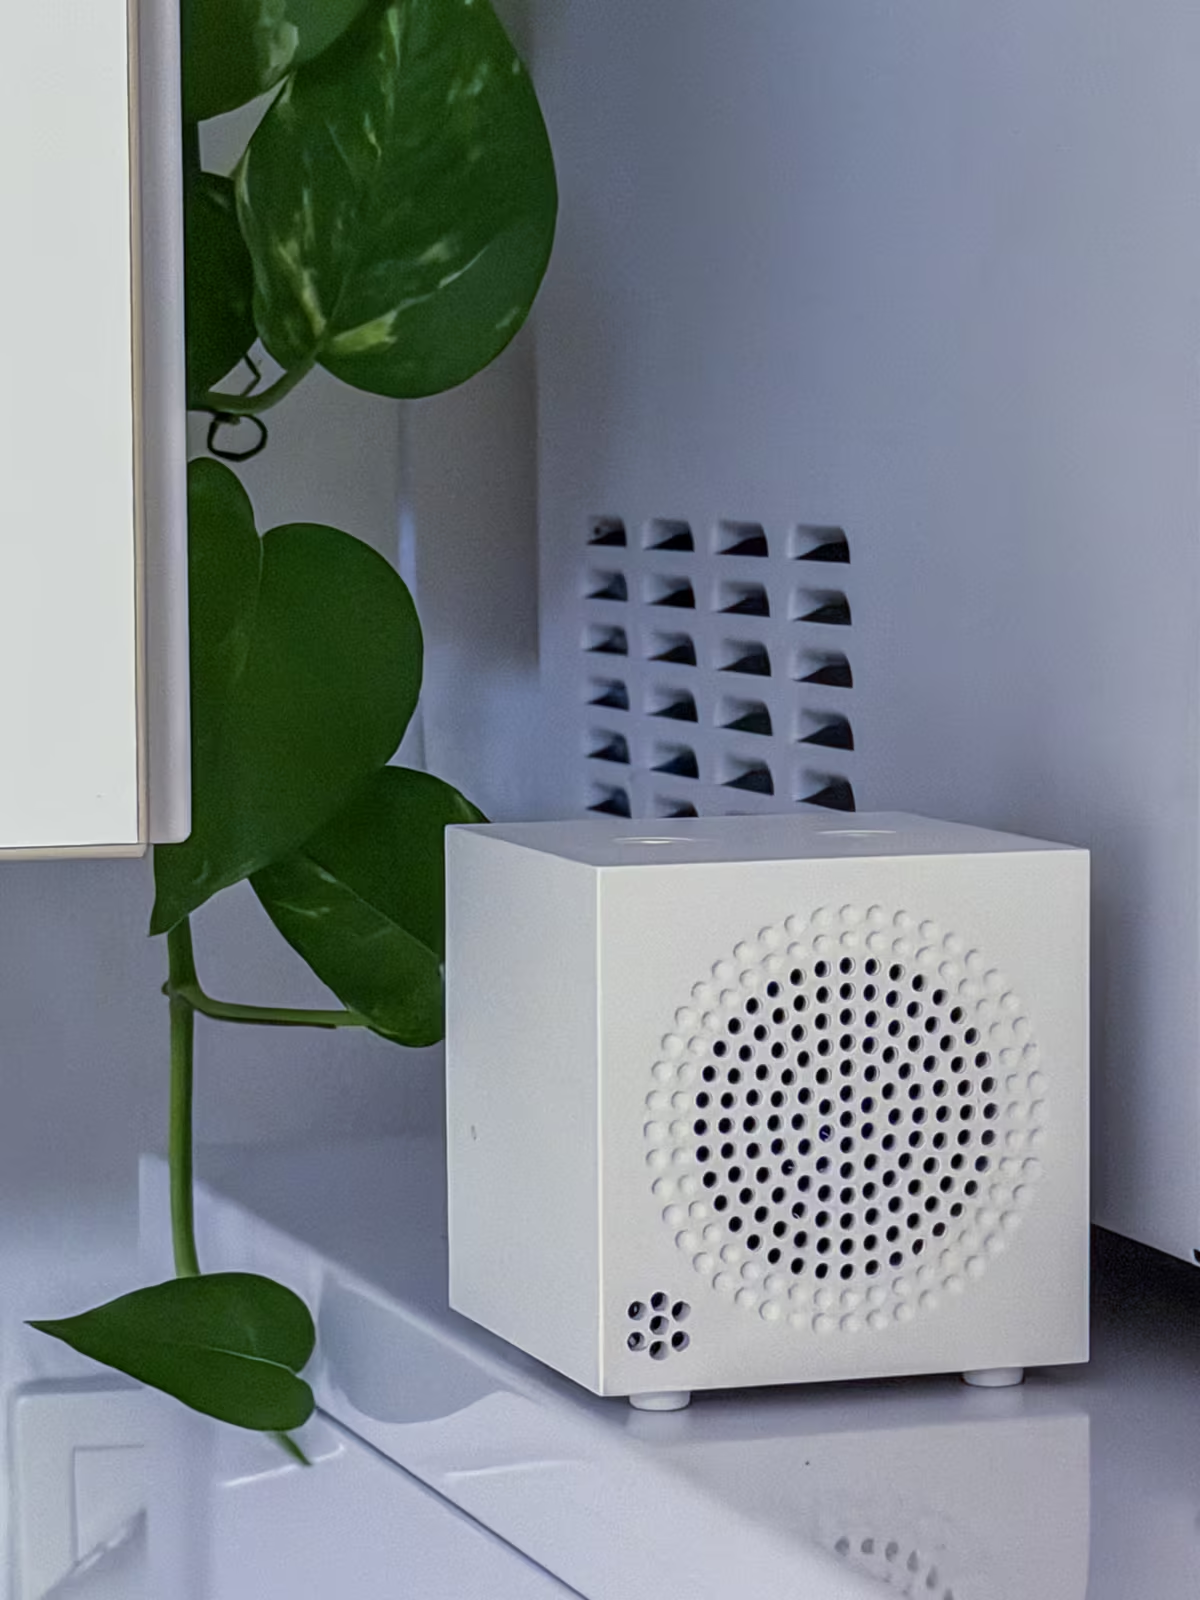
It started with boredom. I was wandering around IKEA with nothing in particular to buy, and I saw the KALLSUP: a tiny Bluetooth speaker for €5.
I thought: cool, it definitely has a speaker inside. It's a Bluetooth speaker, so there's probably a board in there. It has a charging port, so there must be a battery too. Whatever. I only needed the speaker itself, and the little cube would make a nice enclosure.
So I figured I'd buy it and take a look. Worst case, I'd throw away five euros.
Digging everything out
Opening it is easy. Unscrew the two screws on the bottom of the box and it comes apart.
Inside there is only one PCB, with a USB-C port and two buttons on it. It slides out easily. Carefully disconnect the speaker from the board. The speaker itself is screwed to the front panel, behind the holes.
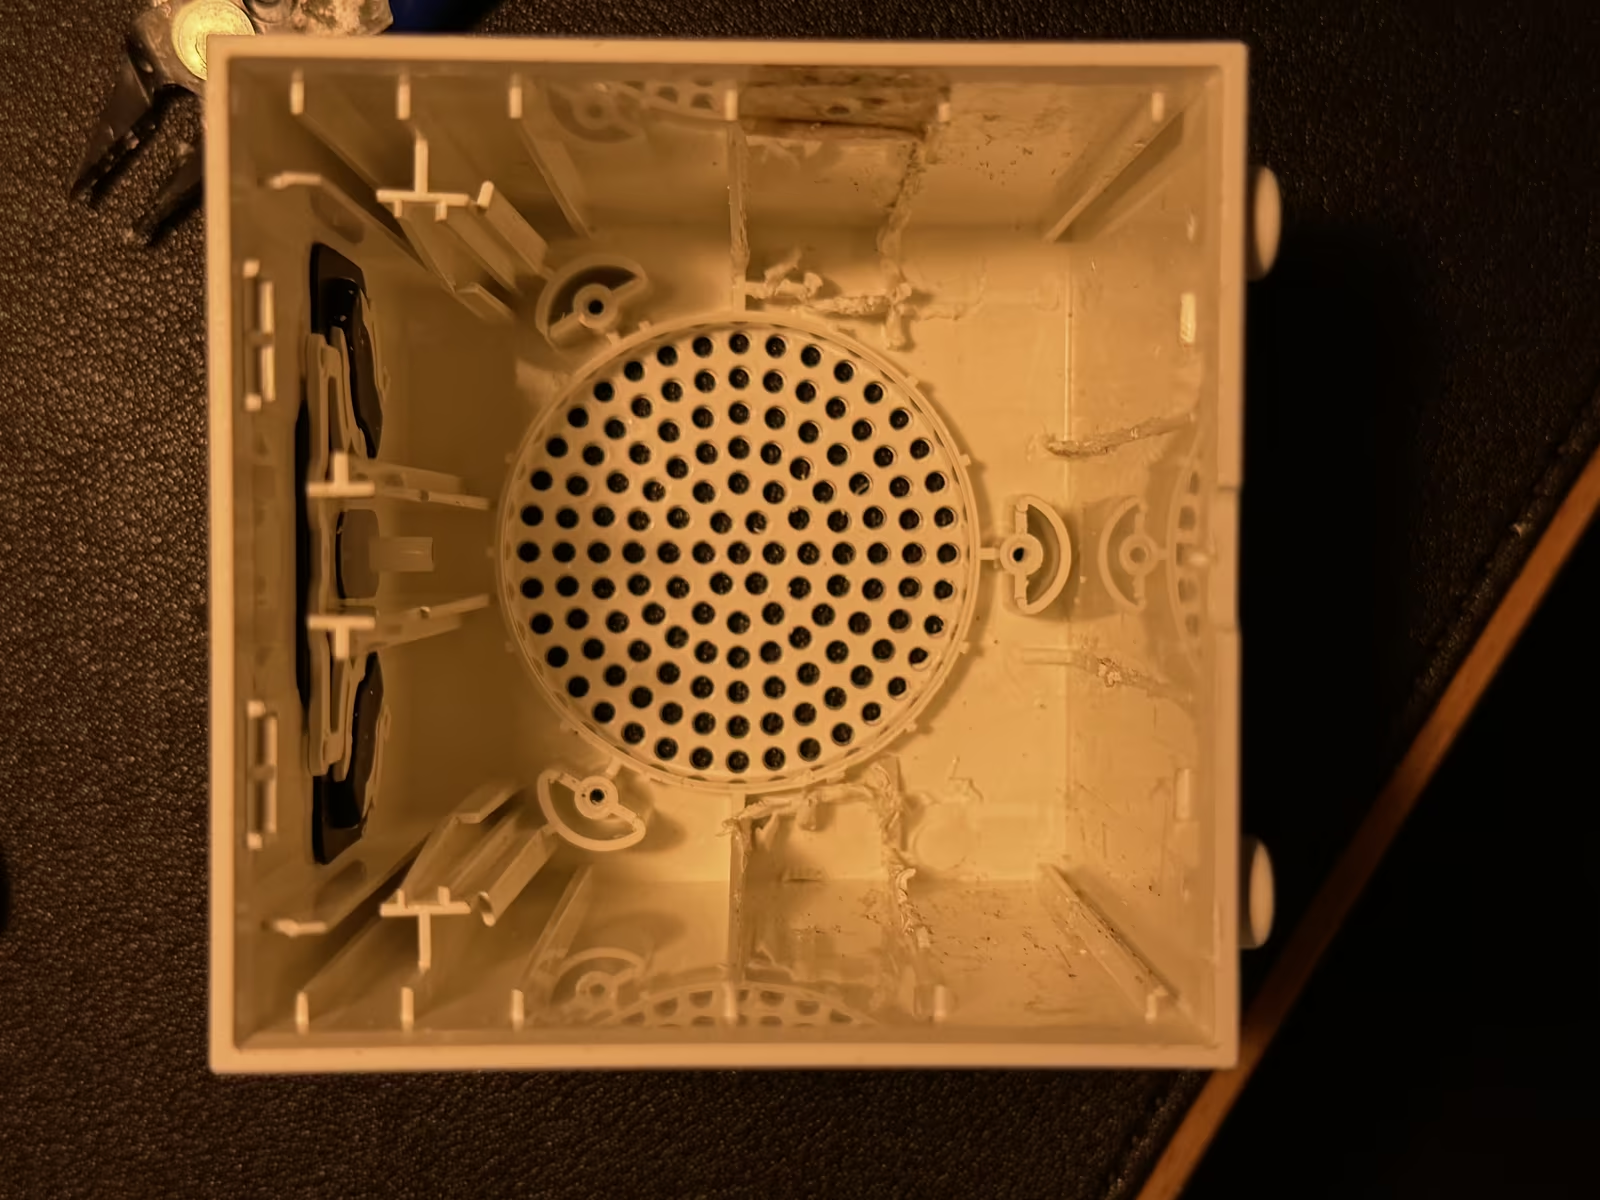
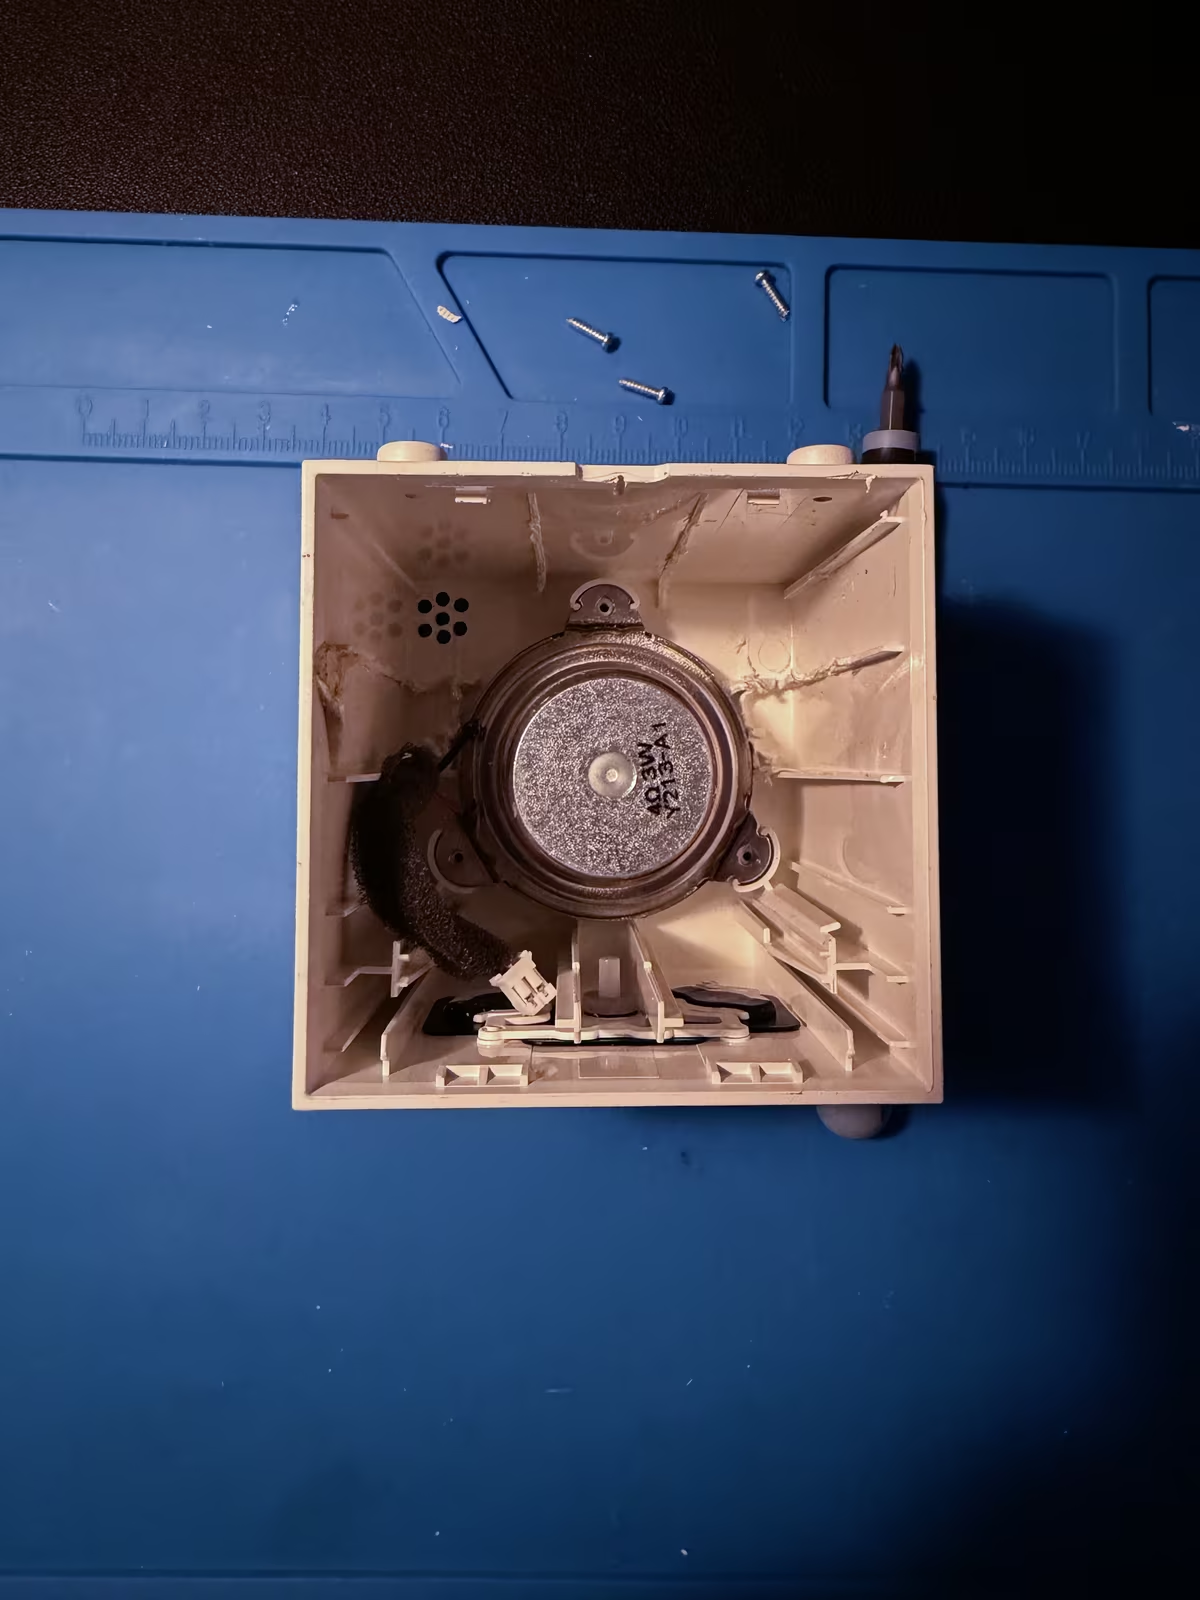
When you look at the PCB, a few things are worth noting:
- The USB-C port. Most likely it charges the battery, and later it will be our power input.
- The battery. Disconnect it. It is 750 mAh and about the size of a normal AA battery, with no model number printed on it. It is a perfectly decent battery, so I took it out to reuse in another project.
- The buttons. You will need a multimeter to work out which pads carry voltage and which belong to the buttons. More on that in the next part.
Keep the PCB. We will be using it.
What you need
The first thing is to get your ESP ready. Here is the full shopping list:
- ESP32-S3 board: XH-S3E, N16R8 (16 MB flash, 8 MB octal PSRAM)
- Amplifier: MAX98357A (I2S)
- Microphone: INMP441 (I2S MEMS)
- Wires: a few Dupont cables
- Pin headers: it is better to assemble everything on pins than to solder wires straight onto the boards
- The IKEA cube, which brings its own speaker, USB-C power input and two buttons
That's all.
Wiring it up on the bench
This is the easy part: connect the pins, and that's it. Here is the full wiring, taken from the working config.
Microphone (INMP441)
| INMP441 pin | ESP32-S3 pin | Note |
|---|---|---|
| SCK | GPIO4 | I2S bit clock |
| WS | GPIO5 | I2S word select |
| SD | GPIO6 | I2S data out of the mic |
| L/R | GND | selects the left channel (channel: left in the config) |
| VDD | 3V3 | |
| GND | GND |
Amplifier (MAX98357A) and speaker
| MAX98357A pin | ESP32-S3 pin | Note |
|---|---|---|
| BCLK | GPIO7 | I2S bit clock |
| LRC | GPIO8 | I2S word select |
| DIN | GPIO9 | I2S data into the amp |
| VIN | 3V3 | temporary, see below |
| GND | GND |
The speaker connects to the amp's two output terminals (+ and −).
Power for the amp. At the beginning, power the amp from the 3V3 pin. The 5V pin on the ESP32 board does not provide 5 V: on this board it is input-only, and neither USB port outputs 5 V there. But 3.3 V is plenty for the speaker to speak out. Later we will bridge the 5 V from the IKEA PCB and move the amp over to it.
Pins you must not use. GPIO26 to GPIO37 are reserved for the octal PSRAM and flash on the N16R8 module.
First test: does it make a sound?
Before building anything clever, just test it. Here is a simple config: upload it through ESPHome and try it out. That's it.
Two small tests, one for each part. Test the speaker first, then the mic.
Test 1: speaker (a sine tone and a melody)
Every 20 seconds it plays a 440 Hz tone and then a short scale. If you hear it, the amp, the speaker and the I2S wiring are fine.
esphome:
  name: kallsup-test
  on_boot:
    priority: -100
    then:
      - delay: 3s
      - script.execute: play_tests

esp32:
  board: esp32-s3-devkitc-1
  variant: esp32s3
  flash_size: 16MB
  framework:
    type: esp-idf

logger:
  level: DEBUG
  hardware_uart: UART0   # COM port. For the native USB port use USB_SERIAL_JTAG

i2s_audio:
  - id: i2s_out
    i2s_lrclk_pin: GPIO8   # LRC
    i2s_bclk_pin: GPIO7    # BCLK

speaker:
  - platform: i2s_audio
    id: spk
    i2s_audio_id: i2s_out
    dac_type: external
    i2s_dout_pin: GPIO9    # DIN
    channel: mono
    sample_rate: 16000
    bits_per_sample: 16bit

rtttl:
  speaker: spk
  id: melody
  gain: 30%

interval:
  - interval: 20s
    then:
      - script.execute: play_tests

script:
  - id: play_tests
    mode: single
    then:
      - logger.log: "Sine 440 Hz, 0.45 s"
      - speaker.play:
          data: !lambda |-
            const int sr = 16000, n = 7200;  // 0.45 s
            std::vector<uint8_t> b(n * 2);
            for (int i = 0; i < n; i++) {
              float env = 1.0f;                       // short fade in/out
              if (i < 800) env = i / 800.0f;
              if (i > n - 800) env = (n - i) / 800.0f;
              int16_t s = (int16_t)(6500 * env * sinf(2.0f * M_PI * 440.0f * i / sr));
              b[2*i] = s & 0xFF; b[2*i+1] = (s >> 8) & 0xFF;
            }
            return b;
      - delay: 2s
      - logger.log: "Melody"
      - rtttl.play: "scale:d=8,o=5,b=140:c,d,e,f,g,a,b,c6"
Test 2: microphone (a level meter in the log)
The speaker stays silent. The log prints the mic level twice a second as a little bar graph. Clap or talk and watch the bar move. If it never moves, check the wiring (my first mic was silent because of a solder bridge between SCK and GND).
esphome:
  name: kallsup-mic
  on_boot:
    priority: -100
    then:
      - delay: 2s
      - microphone.capture: mic

esp32:
  board: esp32-s3-devkitc-1
  variant: esp32s3
  flash_size: 16MB
  framework:
    type: esp-idf

logger:
  level: INFO
  hardware_uart: UART0   # COM port. For the native USB port use USB_SERIAL_JTAG

i2s_audio:
  - id: i2s_in
    i2s_lrclk_pin: GPIO5   # WS
    i2s_bclk_pin: GPIO4    # SCK

microphone:
  - platform: i2s_audio
    id: mic
    i2s_audio_id: i2s_in
    adc_type: external
    i2s_din_pin: GPIO6     # SD
    channel: left          # L/R to GND = left channel
    sample_rate: 16000
    bits_per_sample: 32bit
    on_data:
      - lambda: |-
          static uint64_t sum = 0;
          static uint32_t cnt = 0;
          const int32_t *s = (const int32_t *) x.data();
          size_t n = x.size() / 4;
          for (size_t i = 0; i < n; i++) {
            int32_t v = s[i] >> 16;      // the mic sends 24 bit in a 32 bit word
            sum += (int64_t) v * v;
            cnt++;
          }
          if (cnt >= 8000) {             // about 0.5 s
            float rms = sqrtf((float) sum / cnt);
            float db = 20.0f * log10f(rms / 32768.0f + 1e-9f);
            int bars = (int) ((db + 80.0f) / 2.0f);
            if (bars < 0) bars = 0;
            if (bars > 40) bars = 40;
            char b[41];
            for (int i = 0; i < 40; i++) b[i] = i < bars ? '#' : '.';
            b[40] = 0;
            ESP_LOGI("mic", "%6.1f dBFS |%s|", db, b);
            sum = 0; cnt = 0;
          }
The logger gotcha
The dev board has two USB-C ports: one is a UART bridge (COM), the other is the native USB. The hardware_uart setting in the logger has to match the port you plug into: UART0 for COM, USB_SERIAL_JTAG for native USB. Pick the wrong one and the log is completely silent, which looks exactly like a dead board.
The full voice assistant
Once the speaker and the mic both work, flash the full voice assistant config. Here is how the pieces fit together:
- On the ESP32: the wake word runs right on the board (
micro_wake_word: okay nabu, hey jarvis, hey mycroft), so nothing streams to your network until you say it. After the wake word, thevoice_assistantcomponent streams your voice to Home Assistant. - In Home Assistant: Wyoming faster-whisper turns speech into text, Piper turns the answer back into speech, and Claude is the brain in the middle.
- Beeps: a short Siri-style beep when it starts listening and another when it stops, generated with RTTTL, so there are no sound files.
The config (the Wi-Fi credentials, API key and OTA password are placeholders, use your own):
esphome:
  name: kallsup
  friendly_name: Nabu

esp32:
  board: esp32-s3-devkitc-1
  variant: esp32s3
  flash_size: 16MB
  framework:
    type: esp-idf

psram:
  mode: octal
  speed: 80MHz

logger:
  level: DEBUG
  hardware_uart: USB_SERIAL_JTAG   # for the COM port use UART0

wifi:
  ssid: "<YOUR_WIFI_SSID>"
  password: "<YOUR_WIFI_PASSWORD>"
  power_save_mode: none            # faster response

api:
  encryption:
    key: "<YOUR_API_ENCRYPTION_KEY>"

ota:
  - platform: esphome
    password: "<YOUR_OTA_PASSWORD>"

i2s_audio:
  - id: i2s_out
    i2s_lrclk_pin: GPIO8
    i2s_bclk_pin: GPIO7
  - id: i2s_in
    i2s_lrclk_pin: GPIO5
    i2s_bclk_pin: GPIO4

microphone:
  - platform: i2s_audio
    id: mic
    i2s_audio_id: i2s_in
    adc_type: external
    i2s_din_pin: GPIO6
    channel: left
    sample_rate: 16000
    bits_per_sample: 32bit

speaker:
  - platform: i2s_audio
    id: spk
    i2s_audio_id: i2s_out
    dac_type: external
    i2s_dout_pin: GPIO9
    channel: mono
    sample_rate: 22050     # Piper's native rate; 16 kHz sounded muffled
    bits_per_sample: 16bit
    buffer_duration: 1s

# The media player downloads the answer from a URL, decodes and resamples it
media_player:
  - platform: speaker
    id: mp
    name: None
    volume_initial: 50%
    announcement_pipeline:
      speaker: spk
      format: WAV
      sample_rate: 22050
      num_channels: 1

# Short beeps, no sound files needed
rtttl:
  id: beep
  speaker: spk
  gain: 25%

globals:
  - id: g_last_ww
    type: std::string
    initial_value: '""'

script:
  # Beep, short pause, then listen (so the beep doesn't end up in the recording)
  - id: start_listening
    mode: single
    then:
      - micro_wake_word.stop:
      - rtttl.play: "start:d=32,o=6,b=180:c,e,g"
      - wait_until:
          condition:
            lambda: 'return !id(beep).is_playing();'
          timeout: 1s
      - delay: 150ms
      - voice_assistant.start:
          wake_word: !lambda 'return id(g_last_ww);'

# Wake word runs directly on the board, no server needed
micro_wake_word:
  id: mww
  microphone: mic
  stop_after_detection: false
  models:
    - model: okay_nabu
      id: okay_nabu
    - model: hey_jarvis
      id: hey_jarvis
    - model: hey_mycroft
      id: hey_mycroft
  vad:
  on_wake_word_detected:
    - lambda: 'id(g_last_ww) = wake_word;'
    - script.execute: start_listening

voice_assistant:
  id: va
  microphone: mic
  media_player: mp
  micro_wake_word: mww
  noise_suppression_level: 2
  auto_gain: 31dBFS
  volume_multiplier: 1.0     # 2.0 amplified the noise and Whisper hallucinated "The The The"
  on_stt_vad_end:
    - rtttl.play: "end:d=32,o=6,b=180:g,e,c"   # stopped listening
    - wait_until:
        condition:
          lambda: 'return !id(beep).is_playing();'
        timeout: 1s
    - media_player.volume_set:   # rtttl overwrites the speaker volume with its own gain
        id: mp
        volume: !lambda 'return id(mp).volume;'
  on_tts_start:
    - media_player.volume_set:   # same fix after the answer starts
        id: mp
        volume: !lambda 'return id(mp).volume;'
  on_client_connected:
    - micro_wake_word.start:
  on_end:
    # after the answer, go back to waiting for the wake word
    - wait_until:
        not:
          voice_assistant.is_running:
    - micro_wake_word.start:

# Start listening from Home Assistant (physical buttons come later)
button:
  - platform: template
    name: "Listen"
    icon: mdi:microphone
    on_press:
      - lambda: 'id(g_last_ww) = "";'
      - script.execute: start_listening

# Always-visible volume slider (HA only shows the media player slider while playing)
number:
  - platform: template
    name: "Volume"
    icon: mdi:volume-high
    min_value: 0
    max_value: 100
    step: 1
    unit_of_measurement: "%"
    mode: slider
    update_interval: 1s
    lambda: 'return id(mp).volume * 100.0f;'
    set_action:
      - media_player.volume_set:
          id: mp
          volume: !lambda 'return x / 100.0f;'

sensor:
  - platform: wifi_signal
    name: "WiFi signal"
    update_interval: 60s
Flash it and find it in Home Assistant
Flash it from the ESPHome Device Builder in Home Assistant (that is where your real Wi-Fi credentials live). Home Assistant will pick the board up immediately as a new ESPHome device. Add it, and you will see the media player, the assist satellite, the volume slider and the Wi-Fi signal.
Give it a brain: Claude
Connect Anthropic to Home Assistant and use Claude as the conversation agent. I let an MCP server set the whole thing up in Home Assistant, using a Claude API key from Anthropic. I use Claude Haiku, because it is the fastest model and plenty smart for a kitchen assistant. Then create a voice pipeline that uses a speech-to-text engine, Piper and Claude, assign it to the satellite, and test it.
My pipeline is called "Kuchyň" (the kitchen) and uses English. For speech-to-text I started with Whisper and later switched to NVIDIA's Parakeet (see the gotchas below). For the voice I use Piper's en_US-ryan-medium, slowed down a bit so it is easier to follow.
Gotchas I hit on the way
speaker.playon a stopped I2S speaker silently drops the data. For the answers, usemedia_player: platform: speakerand pointvoice_assistantat it. A barespeaker:gave no output at all.- RTTTL resets the speaker volume to its own gain, which is why the config restores the media player volume after each beep.
- Muffled sound: at 16 kHz everything was dull. Playback at 22.05 kHz, which is Piper's native rate, was a big improvement.
- Whisper hallucinated "The The The" when I boosted the mic with
volume_multiplier: 2.0. Leave it at 1.0. - Choppy, laggy answers were Piper, not Wi-Fi. I blamed my weak Wi-Fi (about −69 dBm), but when I measured Piper directly, the
ryan-highvoice generated speech slower than it plays (about 1.5 times real time with the container limited to 2 CPUs), so the speaker kept waiting for the next piece. Giving the Piper container all 6 cores and switching toryan-mediumbrought it down to roughly 0.1 to 0.3 times real time, and the stuttering is gone. - Whisper was the slowest and least accurate part. On my CPU-only server, Whisper
small.entook about 4 seconds after I stopped talking, and a smaller model mis-heard me. NVIDIA's Parakeet (the 0.6B v2 model, English only) did the same job in 0.4 to 0.9 seconds and transcribed my test sentences correctly. You don't need a new image: the samerhasspy/wyoming-whisperimage can run it. Start a second container next to Whisper (a different port), add it in Home Assistant as another Wyoming integration, and switch the pipeline to it. The first start downloads about 600 MB, so the container looks stuck for a couple of minutes:
  wyoming-parakeet:
    image: rhasspy/wyoming-whisper
    container_name: wyoming-parakeet
    command: --stt-library onnx-asr --model nemo-parakeet-tdt-0.6b-v2 --language en
    volumes:
      - ./parakeet-data:/data
    ports:
      - "10301:10300"
    restart: unless-stopped
- The voice talks too fast. Piper has a
--length-scaleoption on the server (the command of the Piper container). 1.0 is normal; I use 1.5, which makes a sentence about 30 percent longer. It reacts less than the number suggests: 1.15 gave only about 5 percent, so just try a few values and listen.
Bringing the IKEA PCB back to life
Disclaimer: I'm not an electrician. I probably did some terrible things here, so everything in this part is at your own risk.
Step 1: the buttons
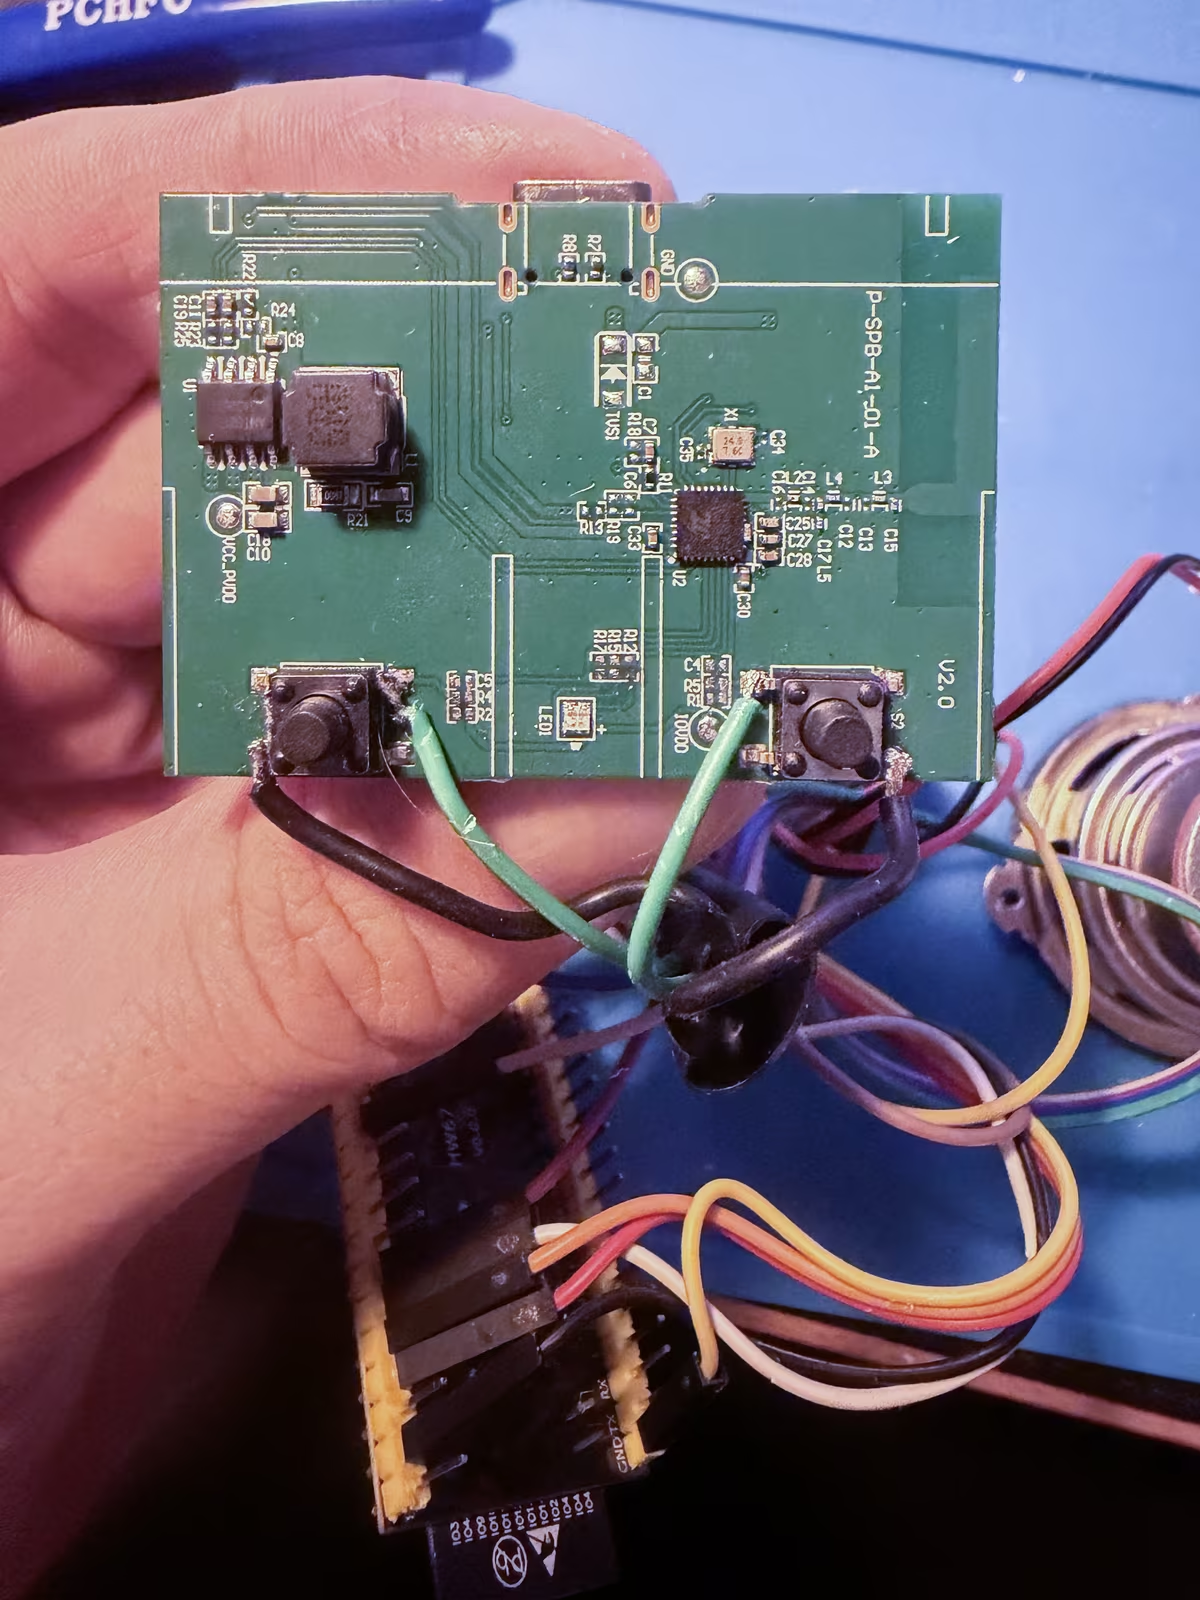
The buttons don't work unless you desolder the resistors next to them. The two that matter are R4 and R2, the pull-up resistors on the button lines. A third resistor sits right beside them and I desoldered that one too, but it turned out to be unrelated, so you can leave it alone. The original chip is still powered through them and disturbs the signal, so the buttons read as permanently pressed. Desoldering those resistors isolates the buttons from the rest of the PCB, and that is all we need.
After that, each button is just a switch. One side goes to a GPIO on the ESP32 (Play to GPIO10, Bluetooth to GPIO11) and the other side to a common ground. The ESP32 uses its internal pull-ups, so no extra parts are needed.
Step 2: power
Flip the PCB over. On the other side there are about five test pads: ground, USB data (two pads), VCC 5 V and a battery pad.
- 5 V pad: this is the one we want. The battery pad only gives about 4.9 V, and we want a proper 5 V.
- Ground pad: skip it. The buttons will share a common ground with the ESP32 anyway.
Carefully solder a wire to the 5 V pad. Use a proper thick one, 24 AWG because this wire carries the power for everything, so it has to be a really good one.
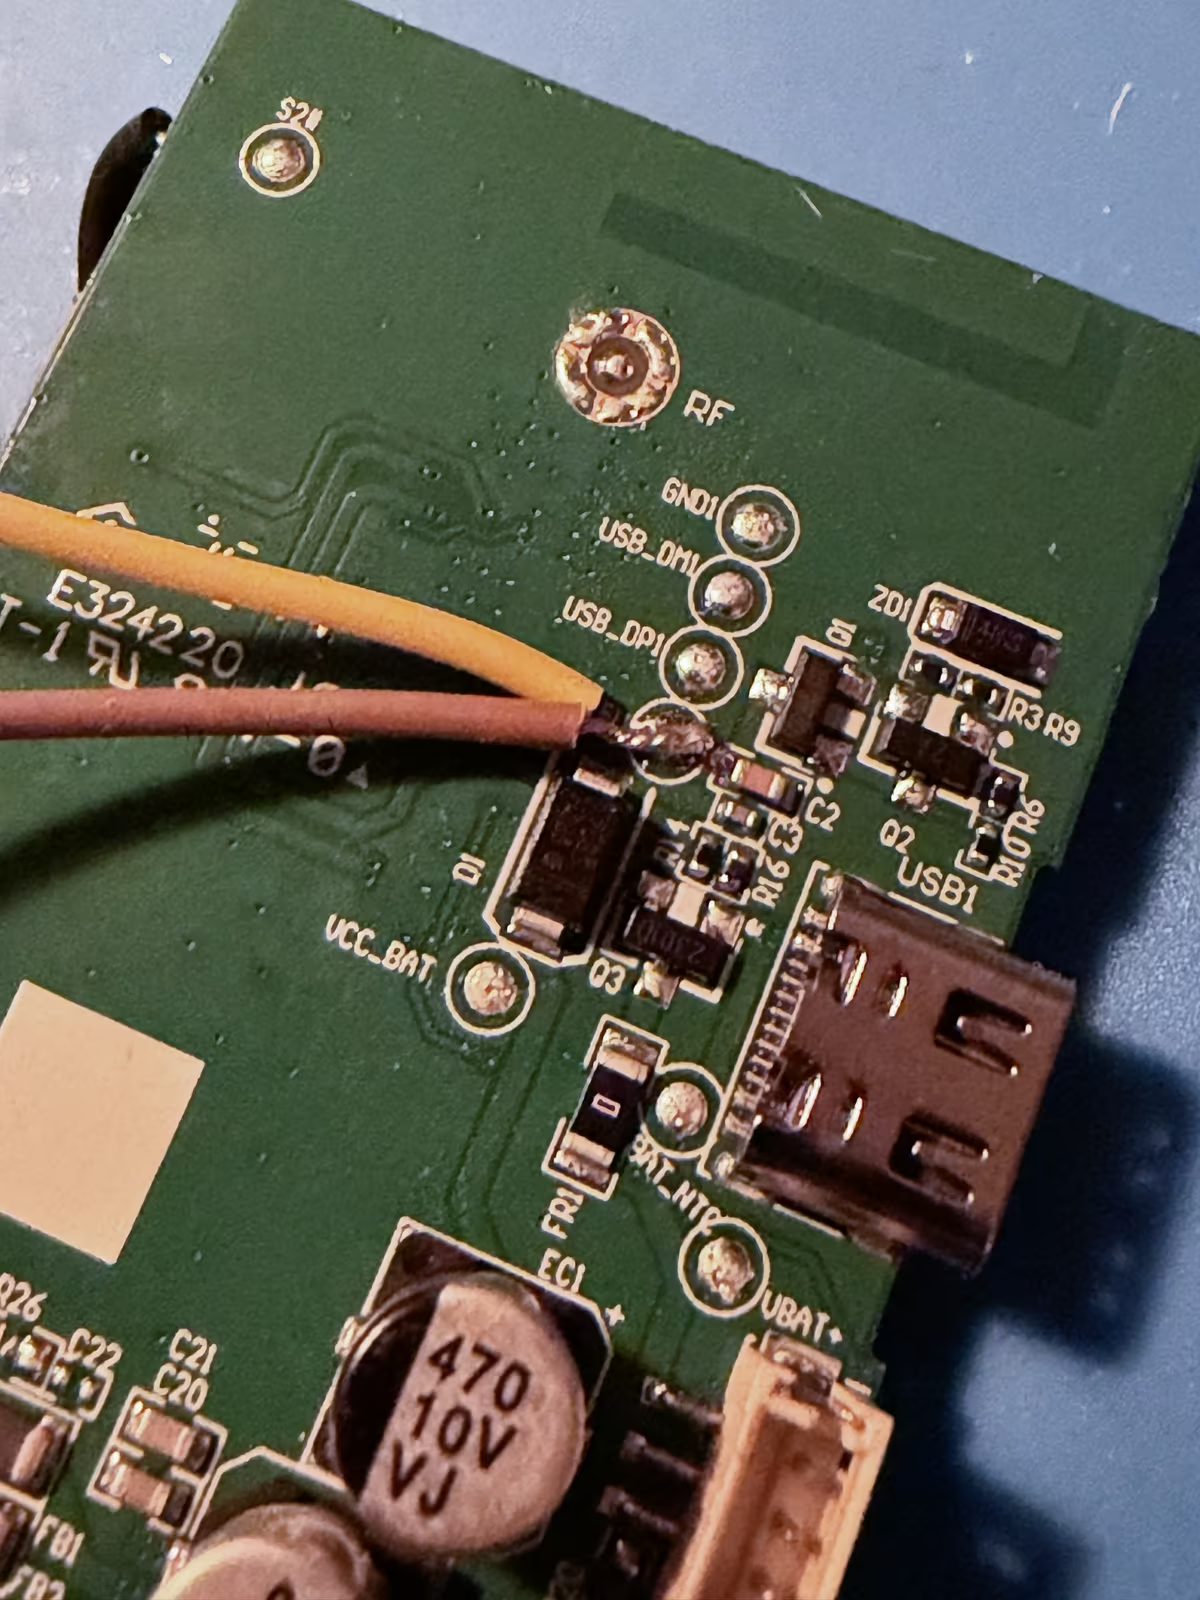
That wire feeds two things, so you need two wires:
- One goes to the 5Vin pin of the ESP32.
- One goes to the VIN of the amplifier, which until now ran from the 3V3 pin. Moving it to 5 V gives the speaker more headroom. On 3V3 the sound clipped at fairly low levels.
Now USB-C on the IKEA PCB powers the whole thing. The dev board's own USB ports are only for flashing and logs.
Step 3: connect the buttons to the ESP32
Now the buttons. Sometimes you just don't want to shout at your speaker, so it's nice to have something you can press. I won't use them very often, but it would be a pity to leave two perfectly good buttons unused.
They are classic tactile buttons, so the wiring is always diagonal: one leg is the signal and the diagonally opposite leg is ground. It doesn't really matter which way round you choose, because it most likely works either way. What worked for me: the signal wire on the bottom-left leg and the ground wire on the upper-right leg, and the same on the other button.
- Signal wires: Play (S1) to GPIO10, Bluetooth (S2) to GPIO11.
- Ground: join the ground legs of both buttons into one common ground, and take it to a GND pin on the ESP32. Note that this ground is shared with the ground of the USB power input, so it is the same ground that powers everything.
Then test them. Flash the config below and press each button: you should see the log line and the binary sensor flip in Home Assistant.
Step 4: use them in the config
Add this to the ESPHome config. Both pins use the internal pull-up and are inverted, because a pressed button pulls the pin to ground. A 30 ms debounce filter on each stops accidental double presses.
binary_sensor:
  - platform: gpio
    id: btn_s1
    name: "Play"
    pin:
      number: GPIO10
      mode:
        input: true
        pullup: true
      inverted: true
    filters:
      - delayed_on: 30ms
      - delayed_off: 30ms
    on_press:
      - logger.log: "Play pressed"
      - lambda: 'id(g_last_ww) = "";'
      - script.execute: start_listening

  - platform: gpio
    id: btn_s2
    name: "Bluetooth"
    pin:
      number: GPIO11
      mode:
        input: true
        pullup: true
      inverted: true
    filters:
      - delayed_on: 30ms
      - delayed_off: 30ms
    on_press:
      - logger.log: "Bluetooth pressed"
      - voice_assistant.stop:
      - media_player.stop:
          id: mp
      - micro_wake_word.start:
I kept the original names on the buttons, Play and Bluetooth. Play starts listening, the same as saying the wake word. Bluetooth is the stop button: it cancels the assistant, stops whatever is playing and goes back to waiting for the wake word.
Step 5: the LED (a failure)
This part of the project is a failure, so I'll tell it as one.
The original PCB has an LED that blinks whenever it has power. Even with the buttons isolated and all the wires soldered, the moment I plugged the USB-C into the wall, the LED started blinking. It was looking for a Bluetooth connection or something like that. It was annoying, and I wanted to get rid of it, or better, take control of it.
So I scouted around the PCB looking for a way to hack it. I found three resistors in the LED circuit, R12, R15 and R17. When I tested them, the colors turned out to be:
| Resistor | LED color |
|---|---|
| R17 | red |
| R15 | green |
| R12 | blue |
It is an RGB LED. The plan was simple: desolder those three resistors to separate the LED from the original chip, then add my own resistors on the ESP32 side and drive the LED from there, for example as a status light for the assistant (listening, thinking, speaking).
While desoldering the resistors, I ripped off the pads as well. That was the end of the idea. The LED can no longer be driven, so the project failed here. That one is on me.
The only good news is that I disconnected the LED, so at least it stopped blinking. It is still sitting there, useless but quiet.
I keep an old config with an RGB LED on GPIO12 to GPIO14 as a backup, in case I want a status light later. Another option is the RGB LED that is already on the ESP32 board.
Step 6: fitting everything into a tiny box
Now comes the worst part: how to fit all of this into a small box.
You will need a tool that cuts plastic (a rotary tool with a cutting disc, for example) because you have to remove a lot of plastic inside the cube.
My final setup: cut away the unneeded plastic, including the cover and the back cover, then fit everything in carefully. You will most likely take it apart and put it back together several times, as I did, so don't glue anything yet. Just put things inside and find out what fits.
The ESP32 will most likely fit diagonally in the box. After that, you can tuck the rest of the parts wherever there is space.
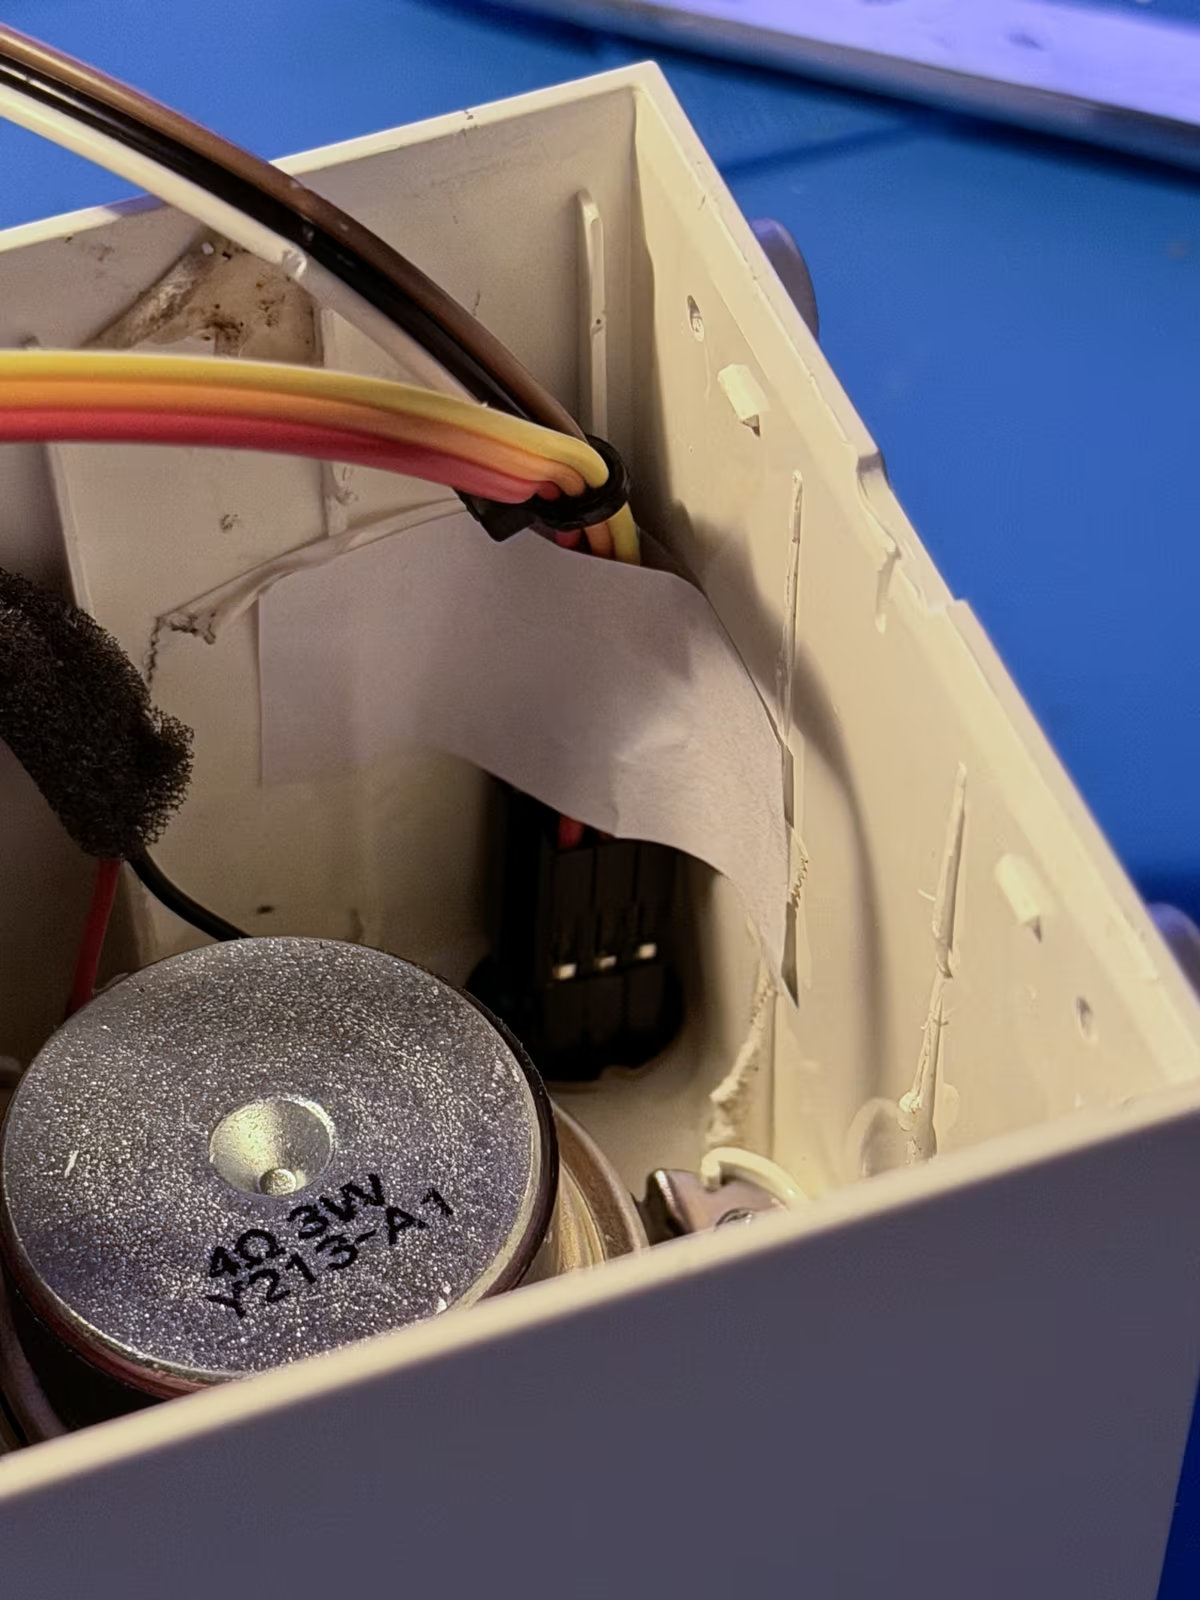
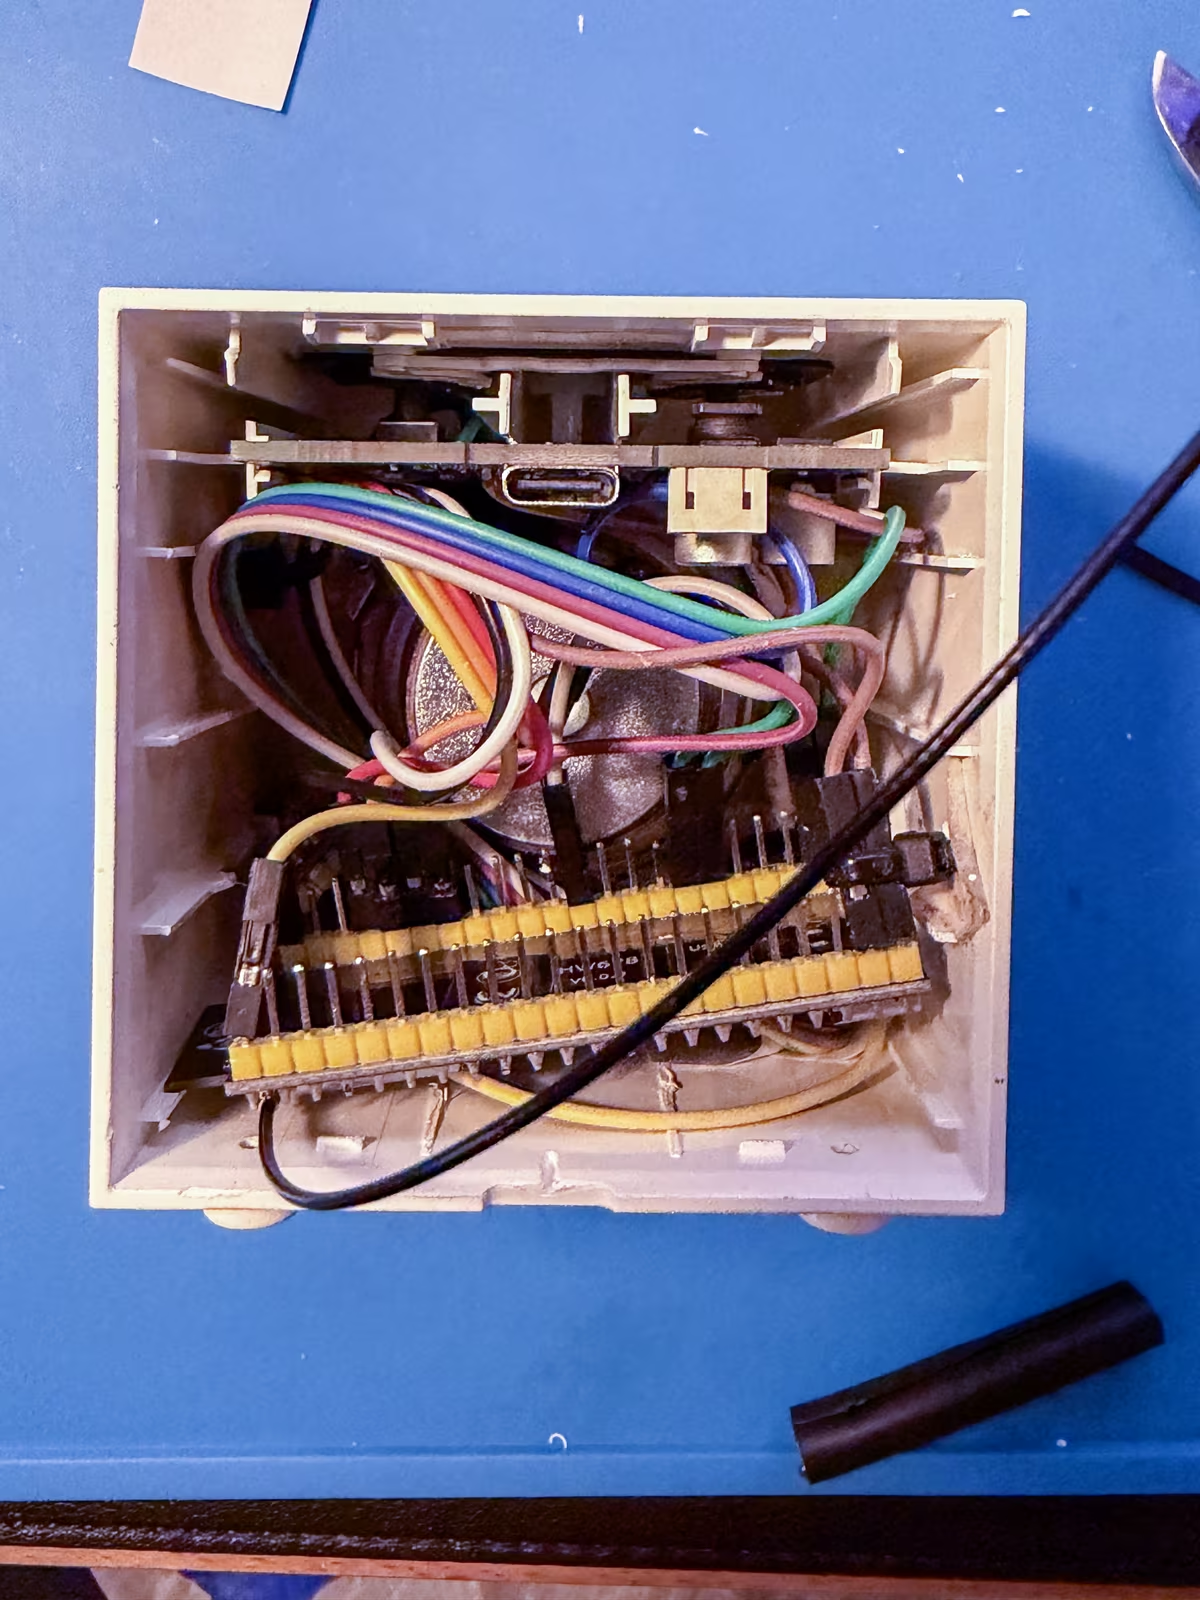
Again, disclaimer: I'm not an electrician, so do this at your own risk.
The microphone hole
The microphone is its own little problem. I couldn't find a place for it in the head of the cube, so I drilled a hole in the right side of the cube, the same size as the speaker holes. Then I used double-sided tape to stick the microphone over the hole.
Why the right side? My speaker sits in a corner of the kitchen and I mostly talk to it from the right. So this is a personal choice. Put the hole where you will stand.
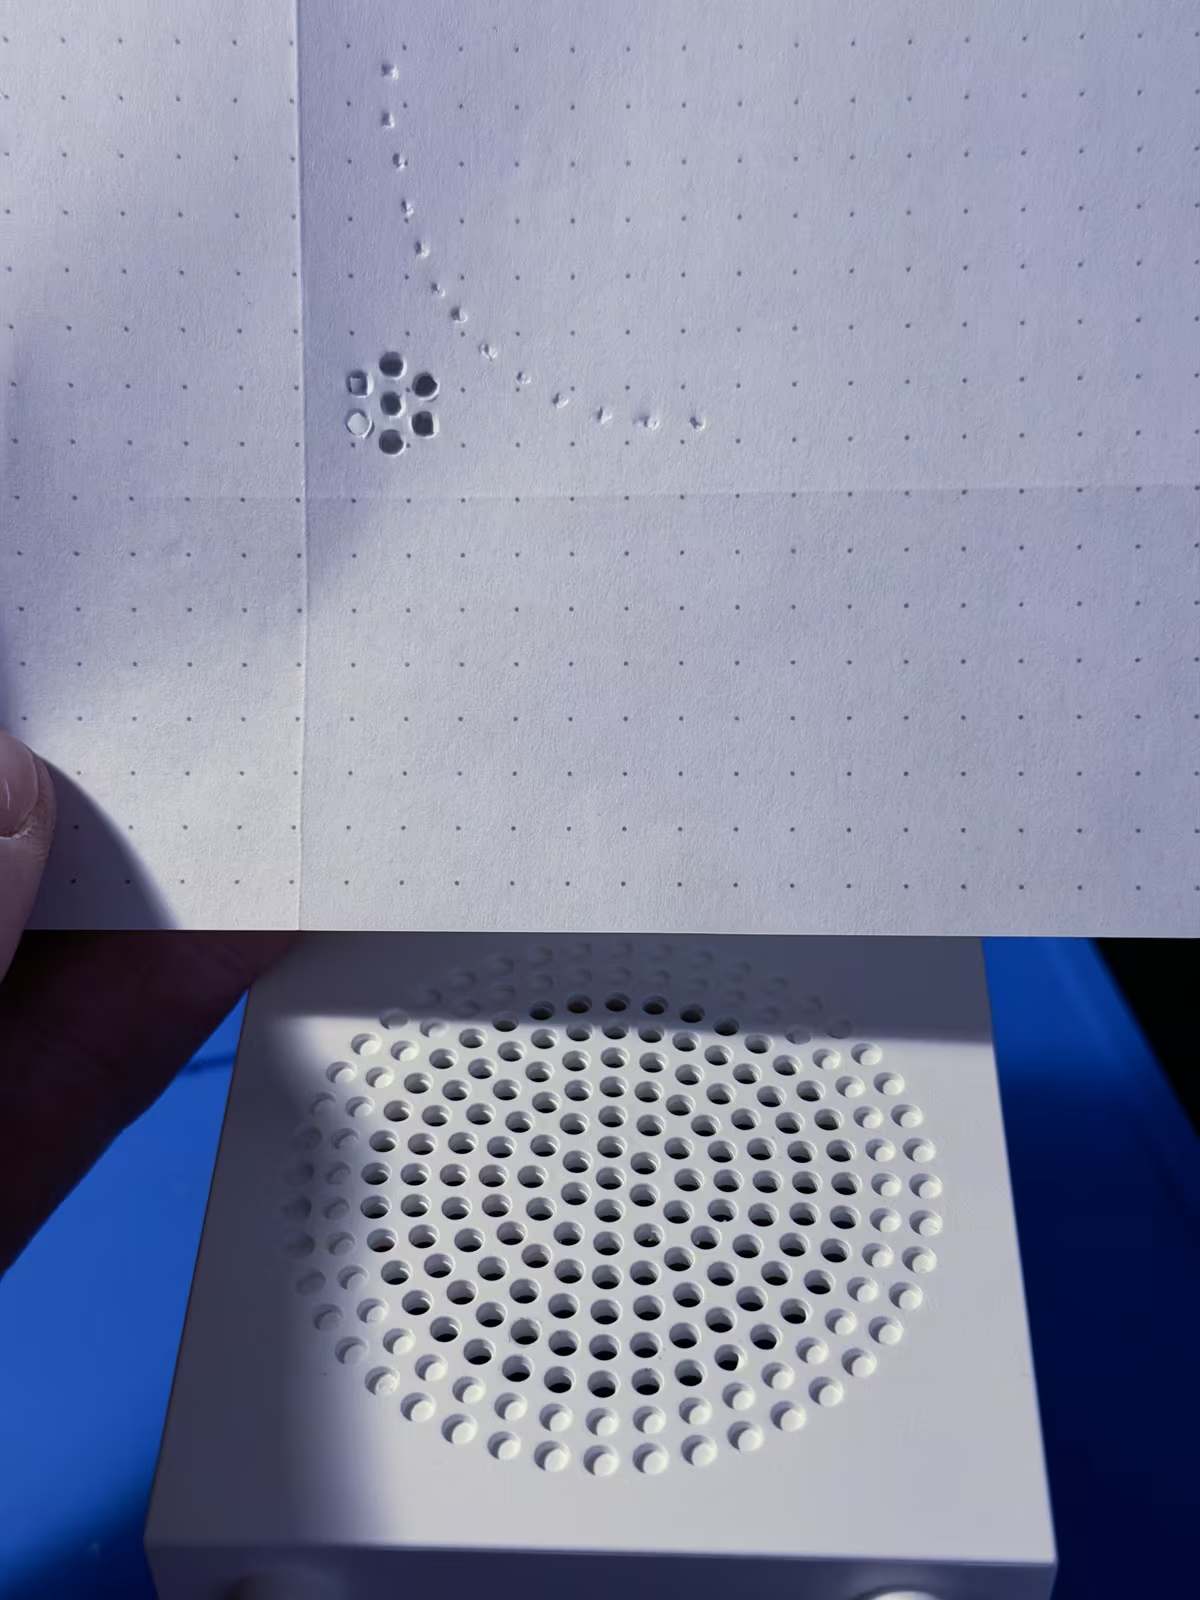
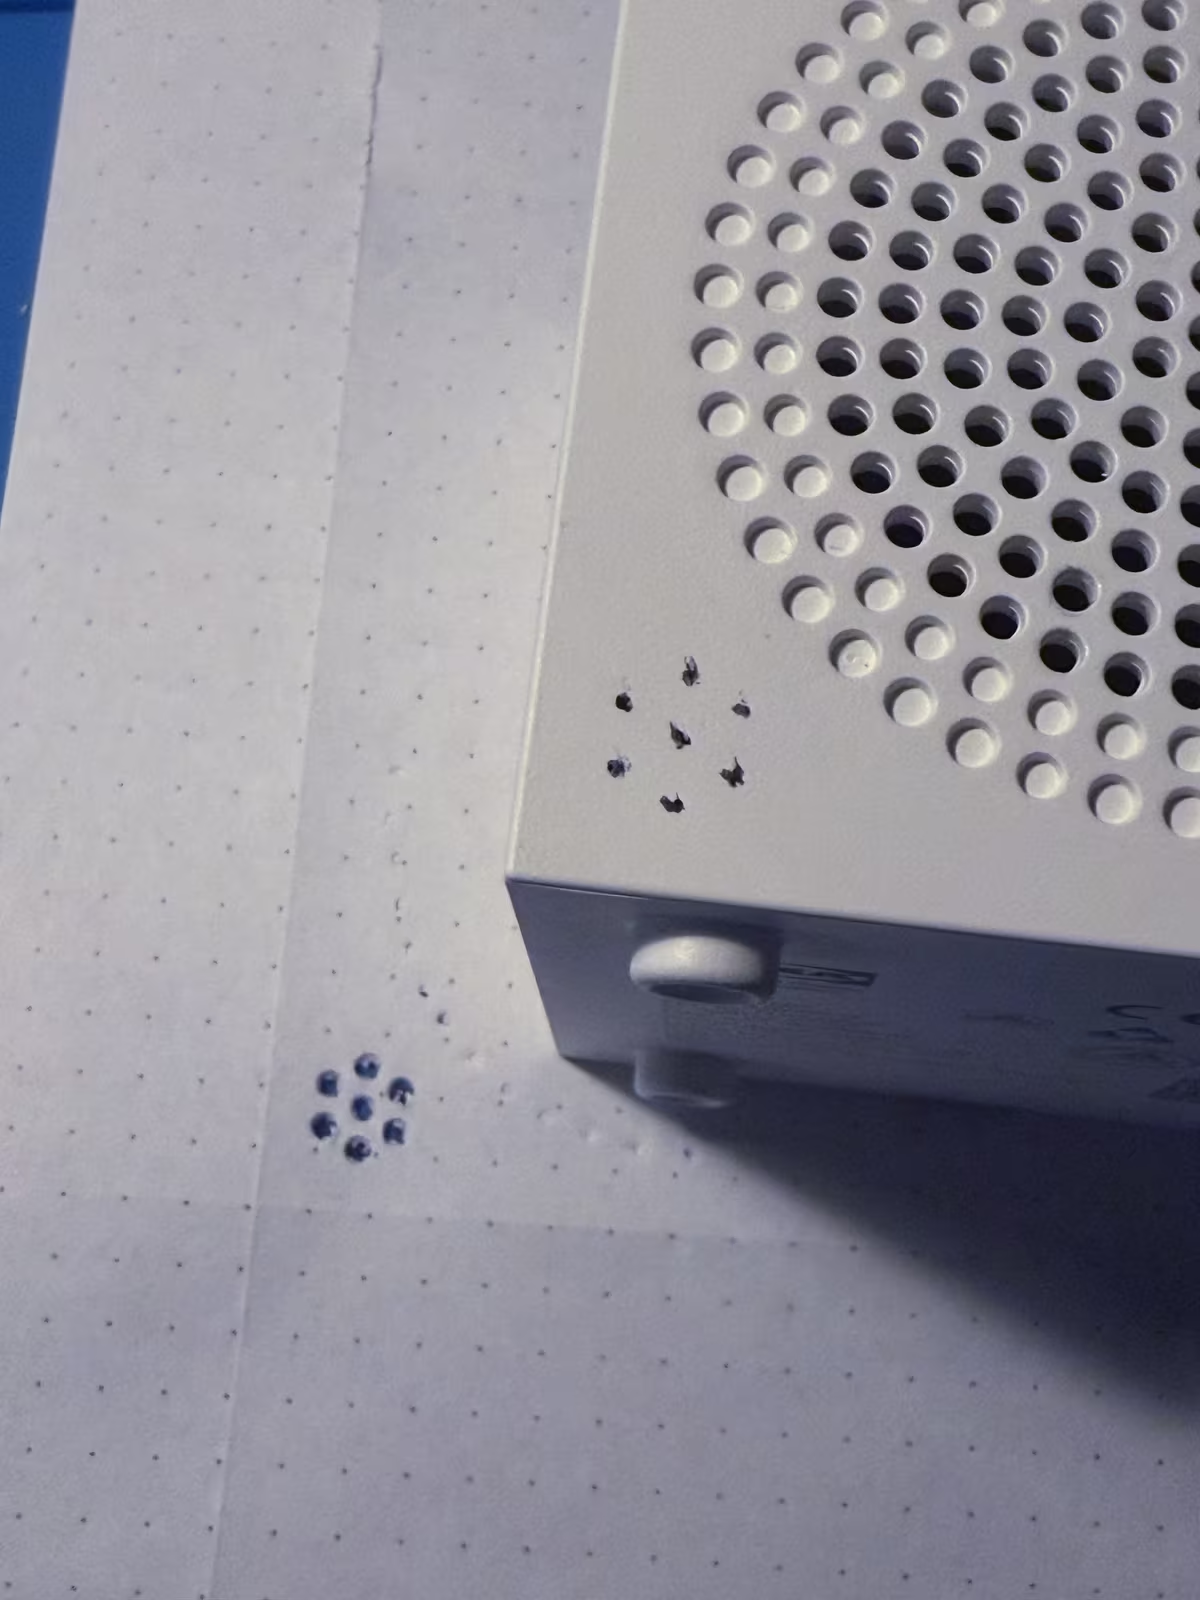
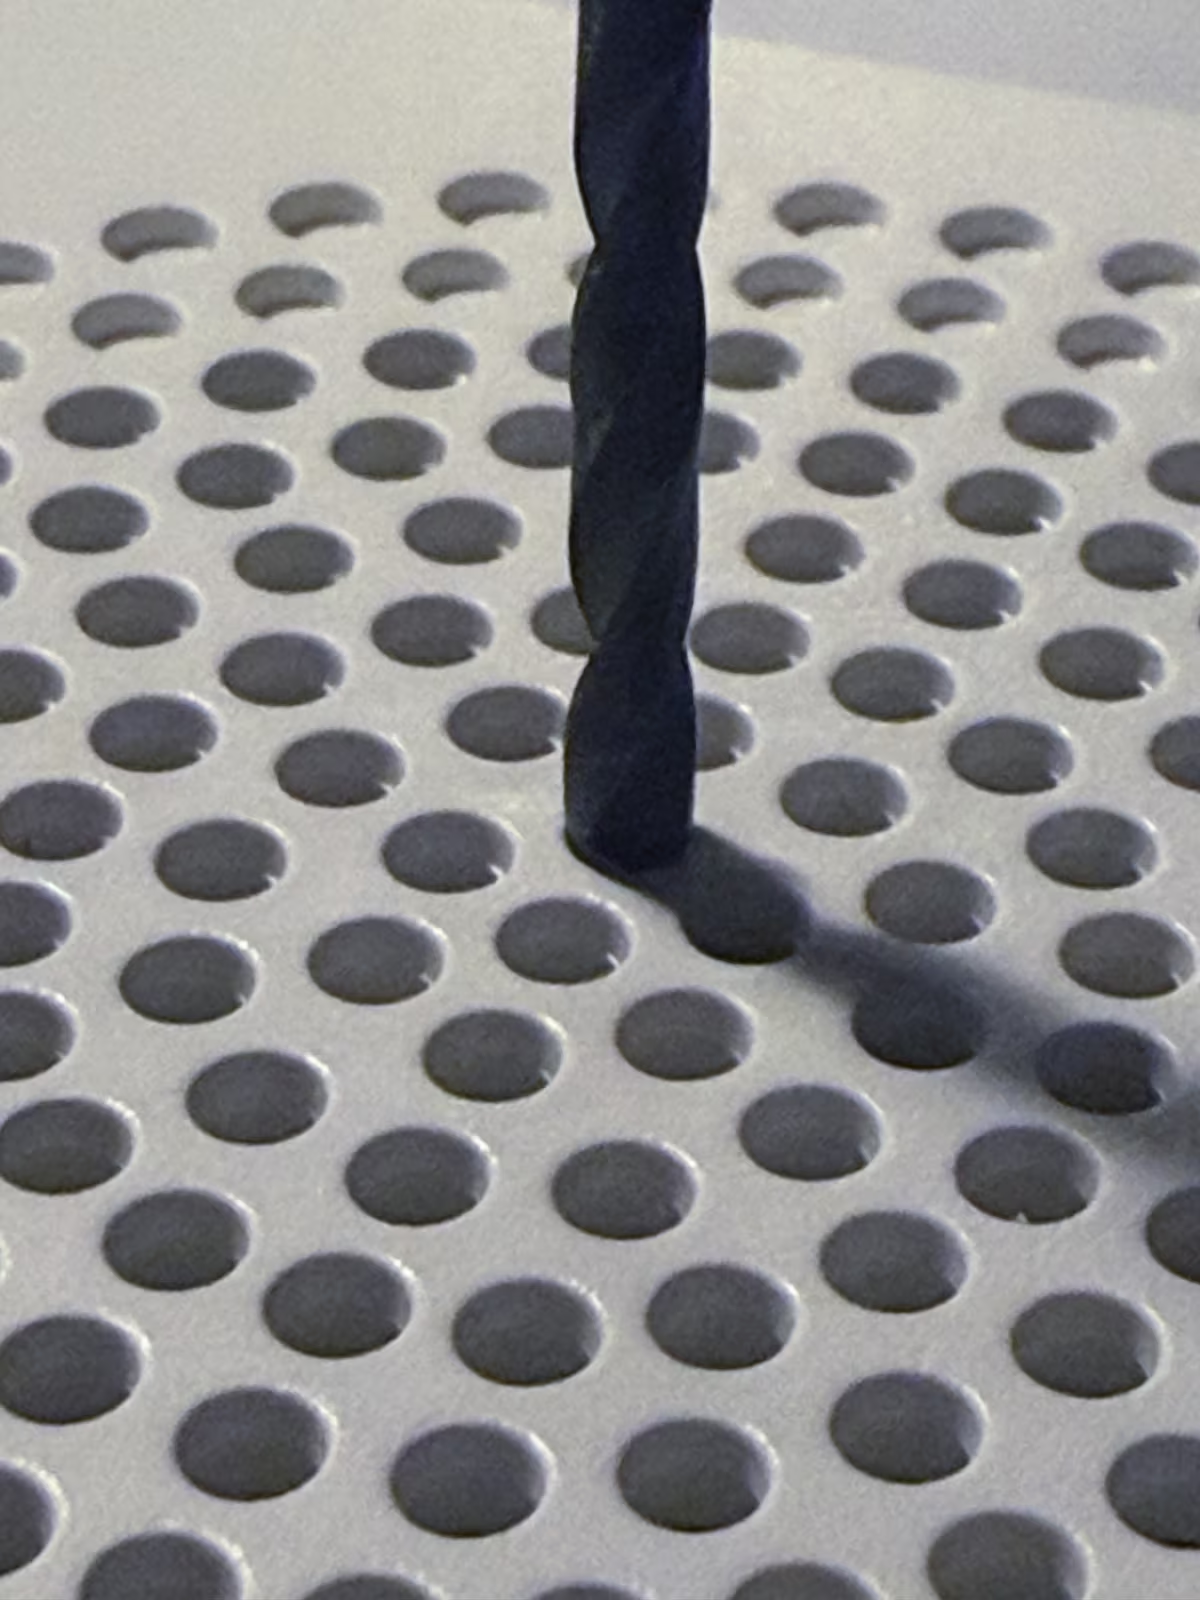
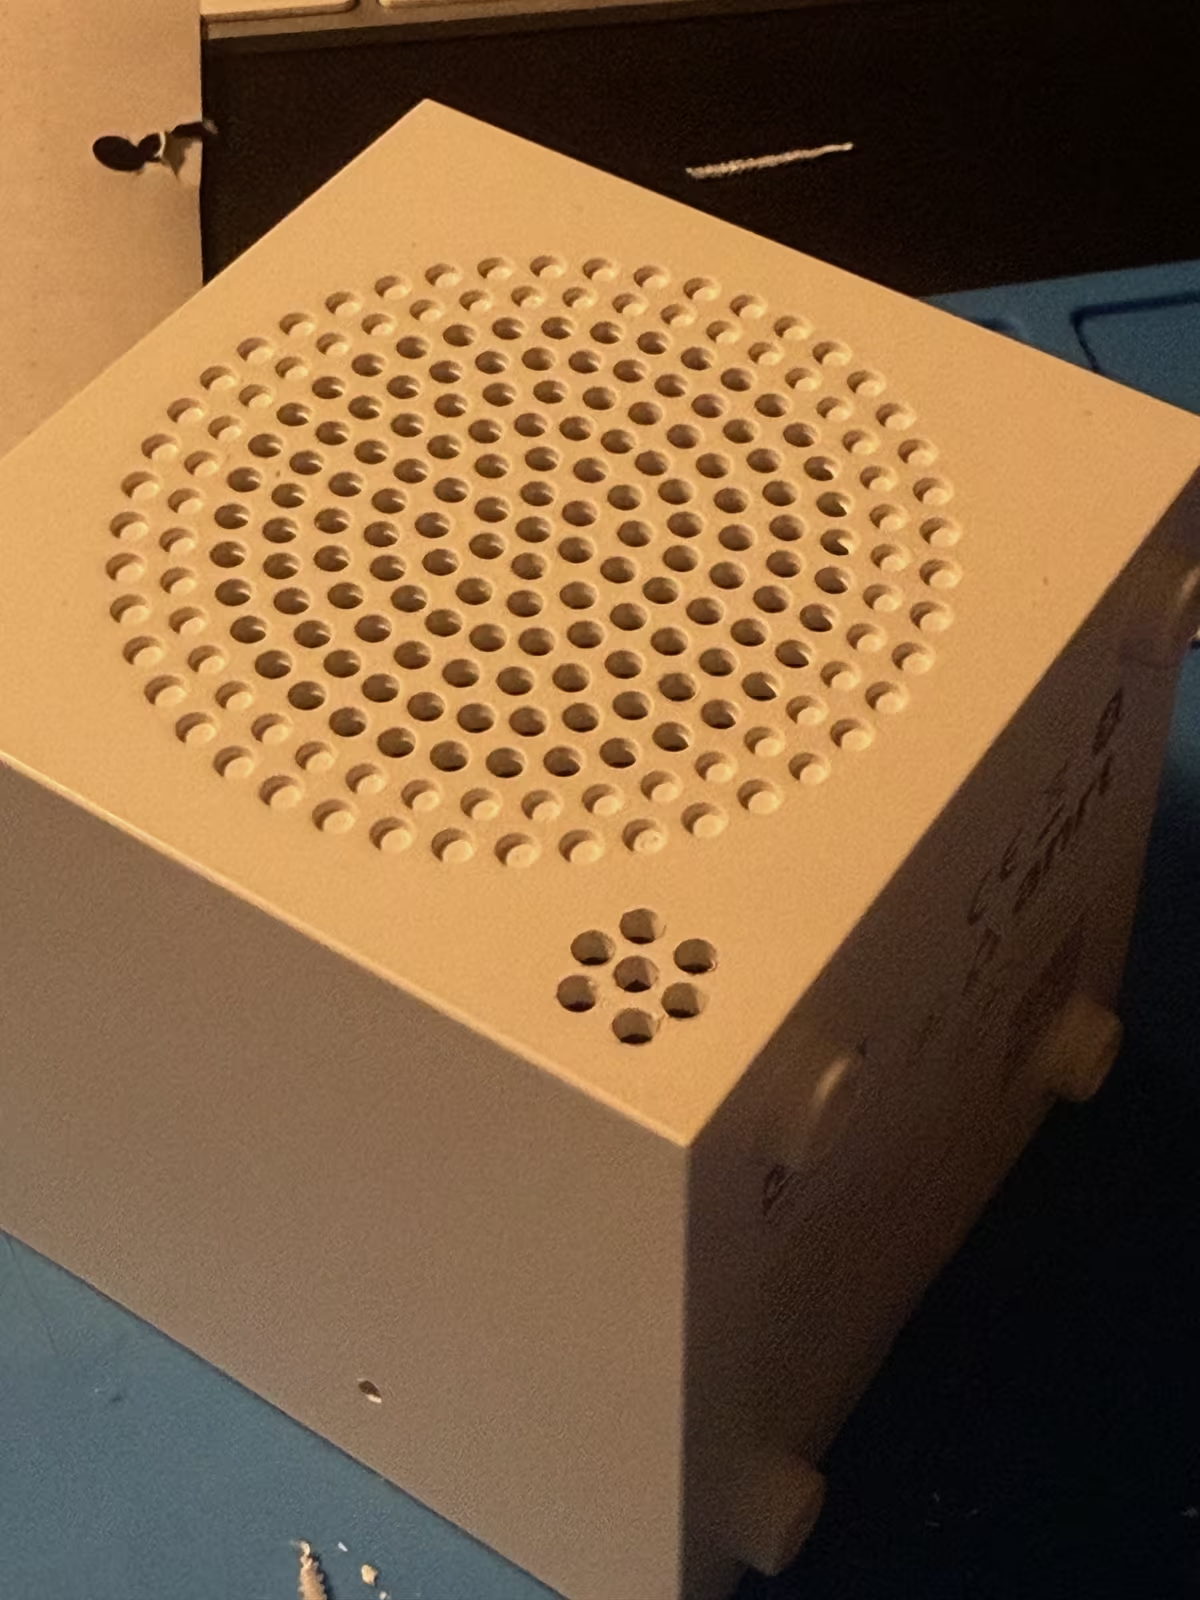
The ideal place would be the top, where the buttons are, because it would be the most universal. But I couldn't find any space there. I just couldn't. Maybe I'll try again, but no luck so far.
At first the assistant sometimes misheard me, and I blamed my accent and the cheap microphone. It turned out the speech-to-text model was the weak point, not the mic: a small Whisper turned "speed of light" into "Peter Flight". After I switched to Parakeet it understands me correctly, with the same microphone and the same hole.
How well does it listen?
The wake word works pretty well. Not only "okay nabu" but also "hey jarvis" and "hey mycroft" are picked up reliably. For a short question, the answer starts about five seconds after I stop talking: roughly 0.6 seconds for speech-to-text, one to two seconds for Claude, and two to three seconds for Piper to speak the first sentence.
Tips I really like
The best part of using Claude as the brain is that you can write instructions for the assistant in Home Assistant, in the conversation agent's settings. It then follows them every time. Two that I use daily:
Morning news. I always wanted to hear the morning news. Home Assistant reads the BBC World and a Czech news RSS feed. Claude picks the most important stories (not just the newest ones) and I get a short news-anchor style briefing: "Good morning, here is what is happening…", three world stories with a line on why they matter, and two from the Czech Republic translated into English. The picking happens once, only when the feed changes, and the result is cached in a helper. When I ask "what's the news", a plain automation with a conversation trigger answers from that cache, so it costs zero tokens and no waiting for the model.
Recipes. When I ask for a recipe, the instructions tell it to:
- give me one short sentence about the dish, then the ingredients, and only then the steps, two or three at a time, asking "Ready for the next steps?" so I can cook hands-free,
- always convert the units to the metric system (grams, milliliters, degrees Celsius), because most recipes online use cups and Fahrenheit and that is annoying,
- and spell out the units in words so they sound right when spoken: "degrees Celsius", not "C", and "half a teaspoon", not "1/2".
An example of what that looks like in the instructions (adapt it to your taste):
You are a voice assistant in a kitchen. Answer in English, briefly, in plain text, because everything is read aloud. Use metric units only and spell them out. For recipes: one short sentence about the dish, then the ingredients, then the steps two or three at a time, asking if I am ready for the next ones. For news, call get_news and speak like a radio news anchor: a short intro, three stories (world first, then the Czech Republic). If you offer to continue, end with a short question.
Keeping the conversation going. If the assistant's answer ends with a question (my instructions tell it to do that when it offers to continue, for example "Ready for the next steps?"), the speaker starts listening again by itself, without the wake word. That is what makes step-by-step recipes pleasant. When the answer is not a question, it goes back to waiting for the wake word.
Future improvements
It works, but it is far from finished. Here is my to-do list:
- Fix the wires. I just took two long wires and stuffed them in, and it's a mess inside. I need to cut them to length and route them properly.
- Better holes for the microphone. Recognition is good now, but the mic sits behind a single hole next to a speaker in a tiny box, so I want to test other positions and add a foam gasket to keep the speaker out of the mic.
- Better Wi-Fi. The board sits around a corner in the kitchen and the signal is weak (about −69 dBm). I first blamed this for the choppy audio, but the real cause was a slow Piper voice (see the gotchas), so it is no longer urgent. My board seems to be the version with a PCB antenna and no antenna connector, so a real external antenna would need a different board with a connector.
- Customize Home Assistant more. I want this to be far more customizable than a HomePod or the other stock smart speakers. I'll keep experimenting with the Home Assistant settings.
I'll share the results here when I get to them.